The Carelessness of youth
I’ve made a lot of 8 bit pixel art in the 80’s and 90’s. This note will include some of these at the end, I hope you’ll enjoy them.
For a lot of these pictures I’ve kept the original Koala Painter files, but quite a few of the files got lost due to my carelessness. So I was very surprised when someone uploaded a long lost demo of mine to the CSDB and it contained pictures I had forgotten all about. And even better, the demo included the original Koala Painter files! Joy!
But then there are also demos out there for which I do not have the source file anymore. It’s time to rectify that by using some hacking skillz, and retrieve the pictures from the demos!
This article will document the retrieval of one picture.
The setup
We will be using VICE as this makes life so much easier. To view the koala files on PC, we use Droid64. It’s a java based, multi-platform D64 file editor, but it also can show koala files! Really handy. It hasn’t been updated for ages, but the program works just fine for my needs.
We start with looking at this demo on csdb. It was made by the Supersonics and it contains a picture I’ve made for them using the Impossible Mission 2 advert:
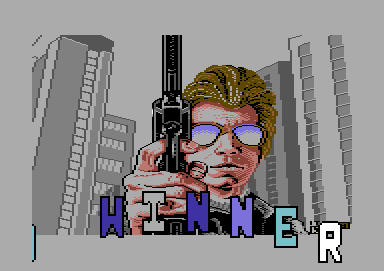 The Mission Sonic demo by The Supersonics
So how to rip it? First we need to know how Koala Painter on the Commodore 64 works. It uses multi-colour bitmap mode. By looking at the demo startup code, we should be able to deduce where in the Commodore 64 memory the data for the image resides. After starting the demo and going to the 3rd part, I use CTRL-H to go into the VICE monitor.
Multi-colour bitmap mode is set by setting two registers: $D011 and $D016. So lets hunt for code that changes these registers. We can forget about the range from $D000 - $FFFF:
(C:$30a8) hunt 0000 cfff d011
1018
3043
3046
310e
3144
8a44
8a62
b504
I find a list of possible locations. Going through them I see this code at $3000 onward:
.C:3000  A9 00       LDA #$00
.C:3002  20 DC 19    JSR $19DC
.C:3005  AD 02 DD    LDA $DD02
.C:3008  09 03       ORA #$03
.C:300a  8D 02 DD    STA $DD02
.C:300d  AD 00 DD    LDA $DD00
.C:3010  29 FC       AND #$FC
.C:3012  09 02       ORA #$02
.C:3014  8D 00 DD    STA $DD00
.C:3017  A9 84       LDA #$84
.C:3019  8D 88 02    STA $0288
.C:301c  AD 18 D0    LDA $D018
.C:301f  29 0F       AND #$0F
.C:3021  09 10       ORA #$10
.C:3023  8D 18 D0    STA $D018
.C:3026  A9 0F       LDA #$0F
.C:3028  8D 20 D0    STA $D020
.C:302b  A9 0F       LDA #$0F
.C:302d  8D 21 D0    STA $D021
.C:3030  8D 86 02    STA $0286
.C:3033  A9 93       LDA #$93
.C:3035  20 D2 FF    JSR $FFD2
.C:3038  A9 08       LDA #$08
.C:303a  0D 18 D0    ORA $D018
.C:303d  8D 18 D0    STA $D018
.C:3040  A9 20       LDA #$20
.C:3042  0D 11 D0    ORA $D011
.C:3045  8D 11 D0    STA $D011
.C:3048  A9 10       LDA #$10
.C:304a  0D 16 D0    ORA $D016
.C:304d  8D 16 D0    STA $D016
Jackpot. Let’s find out how the picture data is distributed. Demo coders sometimes mix up the layout of WHERE the data is kept. Sometimes this is done because of clashes with other code or perhaps a music file that uses the same space. $DD00 controls where the VIC II chip is looking for its 16K block of video RAM. Here are the lines that change that address:
.C:300d  AD 00 DD    LDA $DD00
.C:3010  29 FC       AND #$FC
.C:3012  09 02       ORA #$02
.C:3014  8D 00 DD    STA $DD00
It appears that VIC bank 2 is selected. This means that the base of the 16K of VIC RAM is located at $4000 and it runs to $7FFF. That’s one part of the puzzle found. Now to find out where inside that range the bitmap and screen character layout is placed.
Note
Multi-colour mode is weird: It uses the characters in the screen memory for additional colour information, in addition to the screen color memory at
$D800.
To find the bitmap and colour information we need to look at $D018. Here is the code that modifies that address:
.C:301c  AD 18 D0    LDA $D018
.C:301f  29 0F       AND #$0F
.C:3021  09 10       ORA #$10
.C:3023  8D 18 D0    STA $D018

.C:3038  A9 08       LDA #$08
.C:303a  0D 18 D0    ORA $D018
.C:303d  8D 18 D0    STA $D018
$D018 is divided in two nibbles (4 bit elements). The most significant nibble controls where the VIC II chip is looking for colour information. The least significant nibble tells the chip where to look for the actual bitmap data.
The first part of the code clears the most significant nibble. Bit 4 is then set, being bit 0 in the nibble. Do you still follow me? We need to add 1K to the VIC base address for the number in this nibble. As the nibble now holds the value 1, the color data is located at $4000 + $400 = $4400.
The second part ensures that only bit 3 in the least significant nibble is set, meaning that the bitmap data is located on VIC base address + $2000 = $6000. How do I know what those bits mean? C64 memory map FTW.
The Commodore 64 documentation tells us that bitmap data is 8000 bytes, colour data is 1000 bytes as that is all the characters that fit on the screen (40 lines * 25 rows)
We now know where the data is and how much there is:
- Bitmap data:
$6000 - $7f3f - Multi colour data:
$4400 - $4800 - Screen color:
$d800 - $dc00
We can easily save this with the VICE monitor by entering three commands:
s "1.bitmap" 0 6000 7800
s "2.screen" 0 4400 4801
s "3.colour" 0 d800 dc00
Using 0 as a device will save the data to your PC drive. Handy!
Putting it all together
There is a nice article (linked at the beginning of this page) talking about Koala Painter. It also mentions how a Koala file is structured. It is really straightforward:
The Commodore 64 version of Koala Painter used a fairly simple file format corresponding directly to the way bitmapped graphics are handled on the computer: A two-byte load address, followed immediately by 8000 bytes of raw bitmap data, 1000 bytes of raw “Video Matrix” data, 1000 bytes of raw “Color RAM” data, and a one-byte Background Color field._
By looking at other Koala files using Droid64 I see that the first 2 bytes normally contain 00 and 60, meaning that the koala file is normally loaded to address $6000.
So let’s write down where we need the data to go:
$6000 - 6001- 2 bytes, start address$6002 - 7f41- bitmap$7f42 - 8329- screen$832a - 8711- colour$8712- background colour byte
I can tell you now that using this method gives the wrong results:
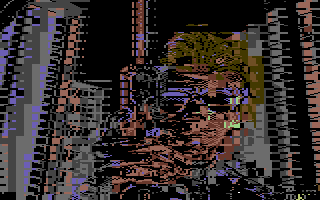 Messed up first try
It looks like the colour data is shifted to the right, and it appears to be two positions. Bitmap data also does not look right. The 2 byte offset at the beginning is causing issues, because on a real machine the first two bytes are not stored into memory. Getting rid of the two bytes at the beginning results in this new table:
6000 - 7f3f- bitmap7f40 - 8327- screen8328 - 870f- colour8710- background colour byte
We open VICE and enter the monitor and then we load the data back into the correct memory areas:
l "1.bitmap" 0 6000
l "2.screen" 0 7f40
l "3.colour" 0 8328
The background colour information is located at the end of the file and we need light grey, so closing the monitor we type POKE 34576,15 and we hit ENTER. Back into the monitor, we save the complete file to disk by using s "koala" 0 6000 8712. Using Droid64, we view this file:
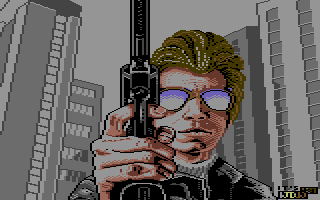
Success!!!!
Bonus pics
I hope you liked this little hacker-y post. As a bonus for reading this all the way to the end, here are some other newly discovered 8 bit pixels:
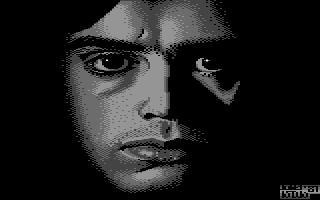 Jean Michel Jarre, I think from the Oxygene LP back cover
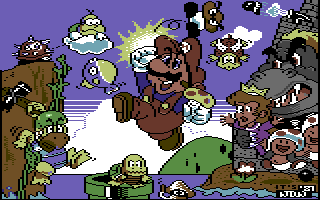 8 bit heroes we all know
 4x5 multi colour character set :)