Welcome back people! In this part we will continue on our quest to complete a full game on the C64.
Last post finished with me talking about the hi-scores, but I decided against doing that in this post. As we have most of the game play up and running now it’s time to start working on the front end of the game. We will enable the game to cycle through an attract mode, after which a difficulty level can be selected and then the game is started.
A LOT has changed in the structure of the code while I was writing this post. Here are the changes:
- Modified the input routines to set a control value instead of performing the controls themselves
- Edited
play.asmto read the control value and do the movement, also needed a rearrangement of the logic - Moved the block movement routines to
blocks.asm - Added the attract mode screens
- Modified the pause screen to use the new screen data movement
- Added the difficulty select screen
This post does not contain all those changes because that would mean a massive post with only screenshots… And it’s already a big post. So instead, I give you the highlights!
We need the new input control method to avoid rewriting these for the difficulty select screen updates… So again, a necessary change to standardise a bit of code.
Note
As always: keep up to date with the code changes and additions in the GitHub respository available here: https://github.com/wiebow/tetris.c64
Input Changes
In order to re-use the input routines we need to make some changes. Instead of checking input and performing the action straight away, we make a change: the update routines will set a byte according to the detected input. This byte can be read by the requesting code. We reuse the keyboard values for the control codes.
This way we can use the same input routines and do different stuff with the results. The change to input.asm is simple:

inputResult is the byte that will hold the registered input. Block movement code is moved to blocks.asm and what is left is the simple routine shown above. We add the NOINPUT constant so we can also register when there was no input.
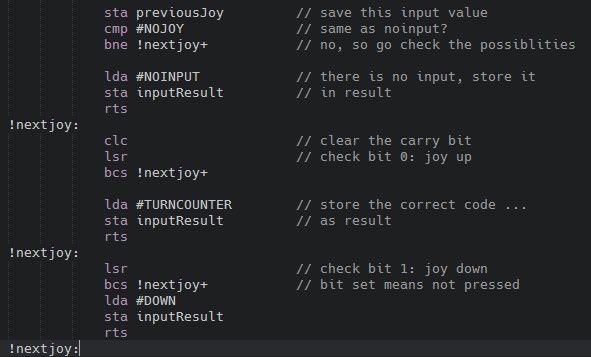
The joystick routine is slightly different. It sets the control code according to the direction pressed. We re-use the keyboard values as they now also represent input result. Here is the relevant bit from GetJoyInput:
The same is done for all the joystick bits we need to test. So now we can use the same input code in all the modes, and we have moved the block movement code to blocks.asm, where they belong. Great!
Attract Mode
Presentation is important and almost every arcade game out there has an attract mode. This is a tradition from the arcade hall era where a game needed to attract the players to the cabinet and make them want to play it, resulting in the insertion of a coin! I remember watching the Donkey Kong attract mode for ages. Heh.
The Nintendo Tetris version is showing a series of screens and it will be fun to replicate those. The attract mode consists of these screens (we will call them steps):
- Title Screen
- Credits
- Controls
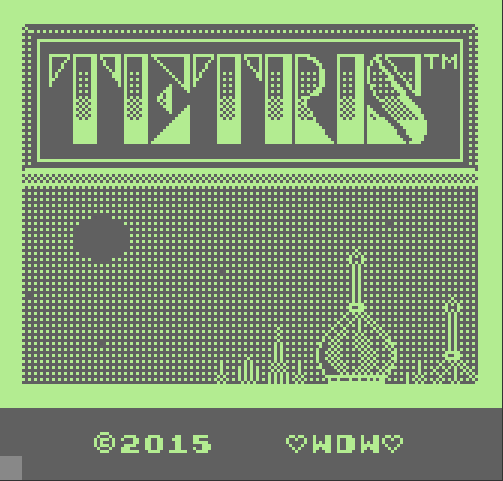
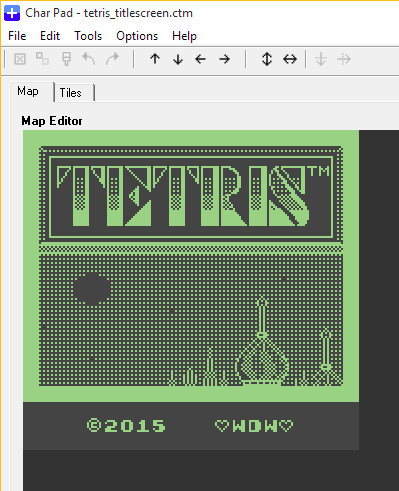
Char Pad is used to create the screens and we will add this data to the game in the same way as we did earlier for the play screen and game over text. When I created the game in 1992 I added a character set that replicated all the graphics from the Game Boy version. As I was able to unearth the set I have a head start! Here’s the title screen I’ve made:
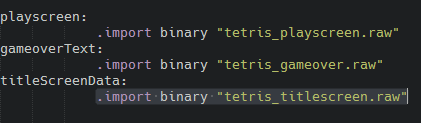
I decided not to put the Nintendo logo in there this time. These are different times you know :) We export it to .raw format and import it into main.asm:
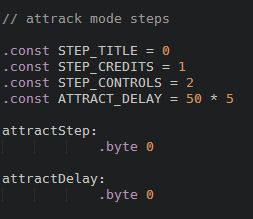
Then, we create the attract.asm file and we define the steps, as well as a byte to hold a delay timer. Between each step there is a delay of 5 seconds. We know the game is updated 50 times per second. So if we decrement a timer value each update, then a start time of 50 is ‘worth’ one second. We need to do this 5 times. 250 fits nicely into a single byte:
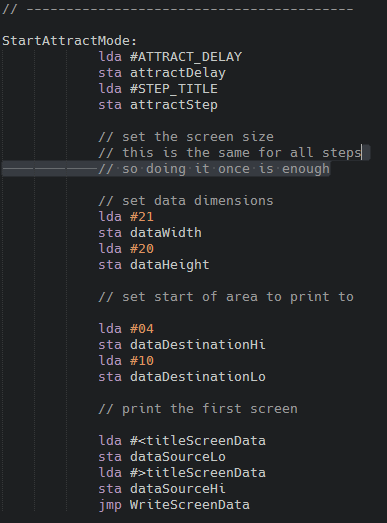
With each step the next screen is printed. Re-writing the screen draw routine has been a good decision: we can easily draw this screen in the first step:
The attract mode also checks for the pressing of the RETURN key or the FIRE button. This check is now easy to incorporate as we changed the input.asm file to set the inputResult byte to the input that was detected:
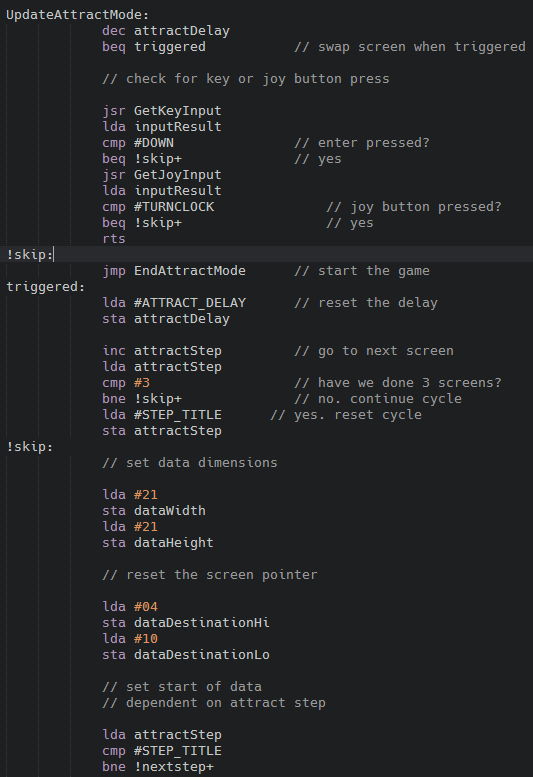
attractStep is incremented and checked when the delay has passed. According to the step value, the screen to render is selected and performed. We repeat the same steps for the controls and credits screen. The cycle is repeated when 3 screens have been shown.
The function EndAttractMode sets up the new mode and starts it:
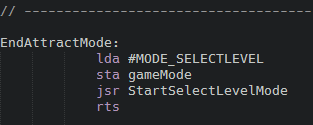
When we press a key or a joystick button in attract mode, the game goes to MODE_SELECTLEVEL. This is a simple check in the UpdateAttractMode routine.
Selecting Difficulty
That is the attract mode done. We can now start the game but before that we must be able to select the difficulty level. The game will display a screen with the levels. The player can use left and right to select the level he/she wants to play and then a hit fire or press return to start the game.
For this we create the level select screen shown below:
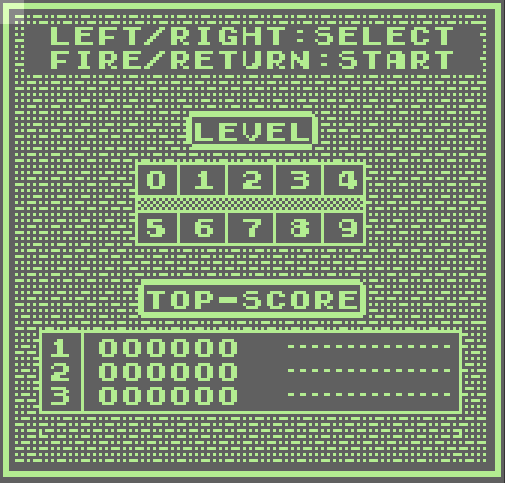
This .raw file is also imported in the main source file. We now have this complete list of screens:
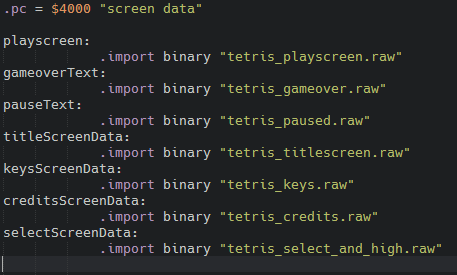
Adding all this screen data causes assembly to go over $CFFF, resulting in a crash when running the program, so I moved the screen data to $4000, right behind the character set data:
Memory Map
----------
$3800-$3f3f character data
$4000-$4964 screen data
$c000-$cb23 code
And no worries, I will add the Char Pad project files to the repository as well.
We create levelselect.asm and start coding! StartLevelSelectMode sets up the screen and resets the essential values:
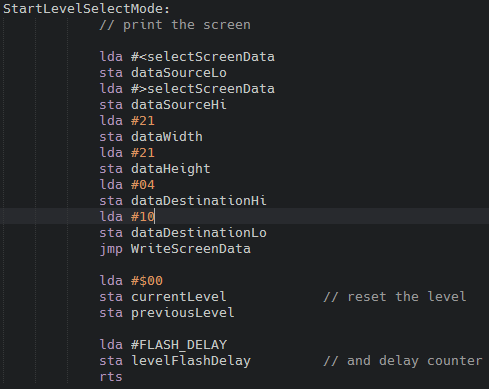
We also need a byte to hold a counter and we need to keep track of the previous level so we can make sure that we are able to redraw anything we leave behind when moving the level ‘cursor’. FLASH_DELAY is a constant we define at the top of levelselect.asm.
We now need to define which screen locations correspond to which level. For this we create a lookup table with the X and Y positions of each level indicator:
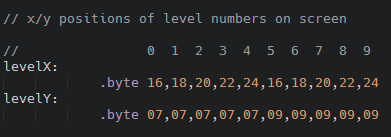
We can easily select the x,y coordinates by using the currentLevel value as an offset. For example: level 4 digit is located on column 24, row 7:
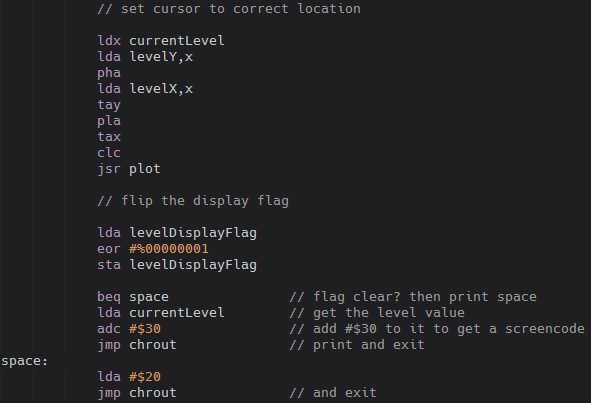
The coordinates are read and the cursor is placed. After that, the flag is flipped and depending on the state a space is printed or the actual number.
All we now need to do is to read the input, and change the currentLevel value accordingly:
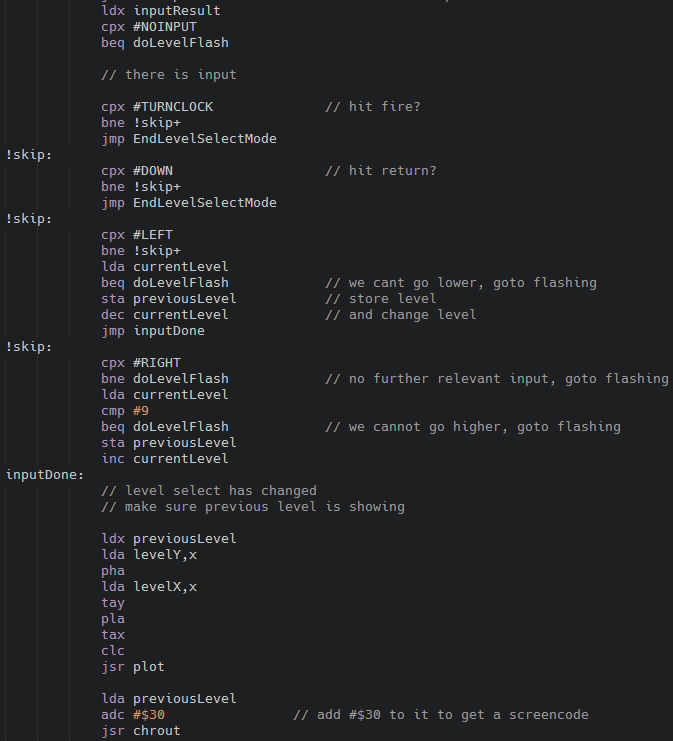
Some boundary checks are in there to stay within the allowed level values. As we change the location of the flashing number, we ensure that the previous number is drawn.
And we’re almost done! We need to calculate the new drop delay for the game and print the current level into the screen when we start the game. This is done in the StartPlayMode function of play.asm:
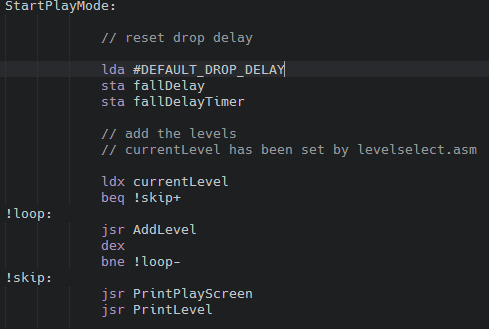
AddLevel is called as many times needed. From here on the game can be played on the selected level.
Now we can start the game, watch an attract mode, start the game, select a level, and play. We also have a game over screen. What’s left is a high score entry screen and code, and then we have a complete game…
Conclusion
This was a hefty post, and a lot has been changed. But for the better: we have a complete game loop, and we did a lot of cleaning up in the code. Next up is really about the high scores. That will be interesting: loading, saving, sorting scores and storing them in memory. All to be seen in Tetris in 6502 - Part 12.
Until next time, happy coding!!