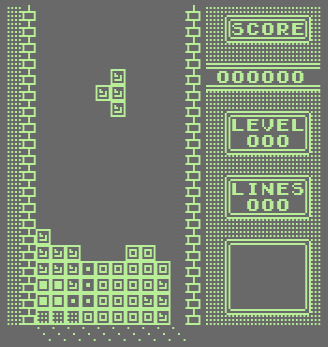
Welcome back! In this part of this ASM epic we will be adding joystick input. We also will add the pause mode to the game. This all adds to the overall game experience and accessibility.
Note
As with all the posts I make a note here of the GitHub location where you can find all the code: https://github.com/wiebow/tetris.c64
Joystick Input
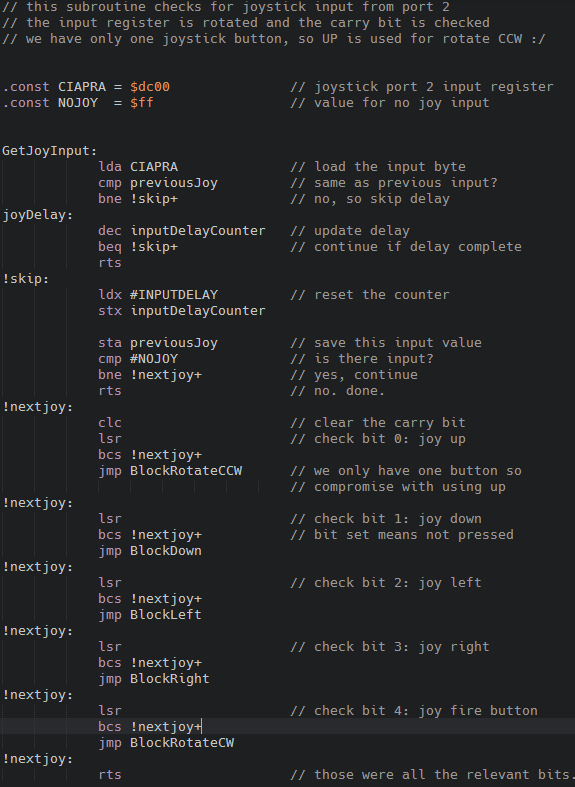
Reading the joystick input on the C64 is very easy. We use the CIA #1 registers that are reserved for this. When pressing a joystick direction (in port 1 or 2) specific bits are cleared in address $DC00 (for port 2) or $DC01 (for port 1).
In order to save memory the C64 designers decided that joystick port 1 and the keyboard use the same CIA address and this causes the well known feature that pressing the CBM key and some other keys to register as joystick input as well. We will be using port 2 so our joystick code cannot be interfered with by the keyboard, and vice versa.
The concept is simple. Specific $DC00 bits are cleared when the joystick is pressed in a direction. We need to test those bits. We can use the value and then operate on it with multiple AND instructions, but a simpler method is to use a handy feature of the LSR command. LSR shifts bits to the right, and the bit that is ‘leaving’ the byte is moved to the carry bit. So with a carry bit check we can see what the value of each bit is.
So here we go:
We use the same delay code as the keyboard input, because it works. I renamed keyDelayCounter to inputDelayCounter. The structure is the same as the keyboard input routine. As we only have one joystick button to test on, I used UP to rotate counter-clockwise. It’s a compromise but its good to have it: my old Tetris game could only rotate clockwise, and it has always annoyed me.
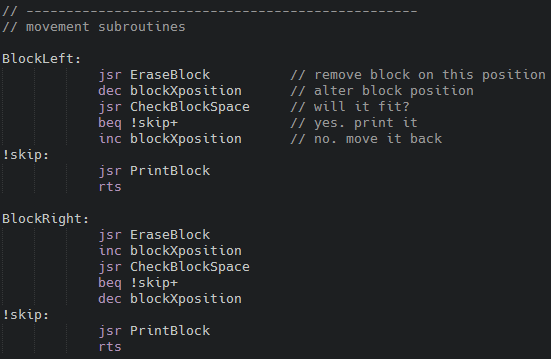
Having two input methods leads to duplicate code so I moved the block movement bits into their own subroutines so they can be called by joy and keyboard input routines:
Only the first two are shown here, but you understand that the rest of that code is moved in the same manner and we change the keyboard input code to use the same routines. This makes input code a bit slower, but I like code cleanness and we can spare the additional 2 cycles. :) So that takes care of the game input, and I think for now we’re done with it unless something crops up later.
Pause Mode
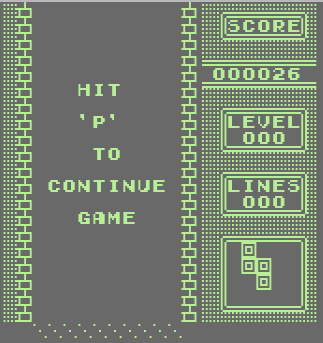
When the game is paused it must clear the play area and show the pause message and the continue text. For this to work we need a way to save the play area memory and place the text into the screen memory. When the game is un-paused we place the buffer content back into the screen memory.
So let’s define a buffer space to store the screen memory. We need 20x10 characters. It would be nice if we can reuse this buffer for other means as well. No need to waste memory.
We add code to screens.asm to save and restore the play area to and from a buffer. First we define the buffer. We know we have 20 lines, each 10 characters wide so let’s reserve that amount of bytes:
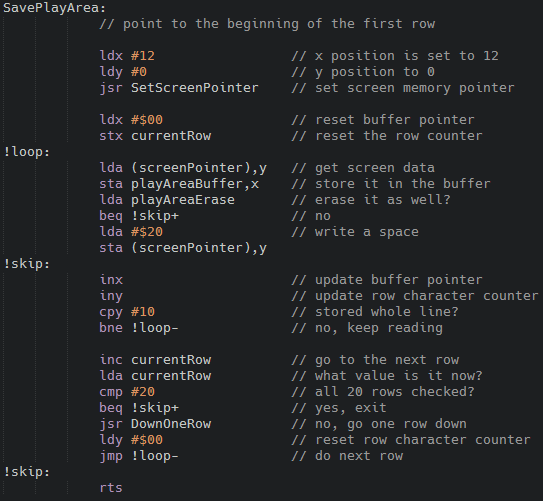
Now we need a loop to copy the lines to the buffer. Hey, that rings a bell! We already have made something very similar when checking for lines and saving its data to facilitate the flashing of lines. Let’s copy the relevant CheckLines code from lines.asm and modify it to store the data in our buffer instead:
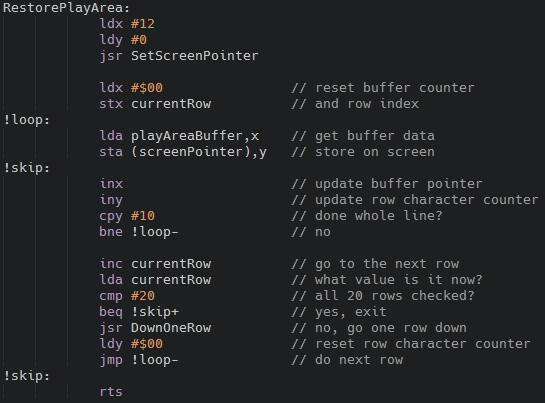
This is almost the same as the line checking routine, but it writes to the buffer instead of checking for spaces in the line. We know we need to save 200 bytes, so no page overflow check is needed for buffer writing or reading. Restoring the data uses the same logic, but vice versa:
Data is read and then written to screen memory. I don’t think an explanation is needed here. We then need to add the pause toggle to the key input routine.
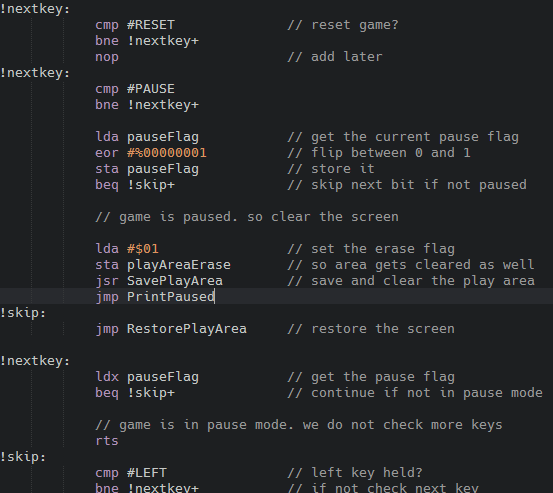
We need to change the order of the keys checked. We check the Reset key first because that must always be available. Then we check the pause key. If it is hit, we flip bit 0 in the pause flag byte.
If the game is in pause mode then we clear the play area by calling SavePlayArea and print the pause text by jumping to PrintPaused. If the game is not in pause mode, we restore the play area by calling RestorePlayArea.
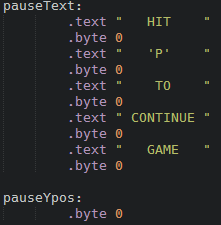
We need to add the pause text. I added it to screens.asm:
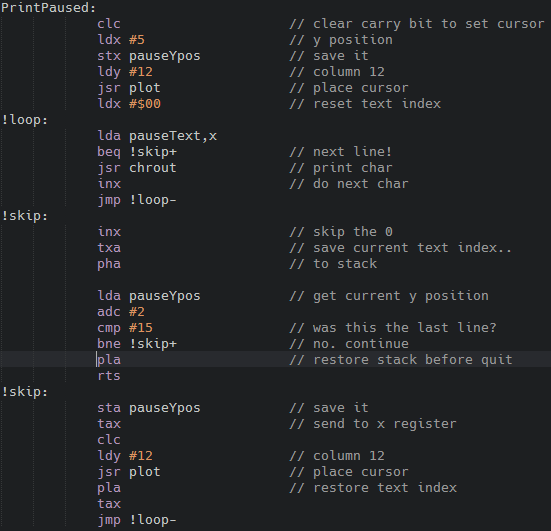
Each line is terminated with a 0. We start printing this at 12,5 and there will be an empty line between each text. We also add a byte to store the current print Y pos. This is needed for the following code that prints the text:
Positioning the cursor is the same as used in the score printing routines. We have not used the stack a lot, but as we need the X register to set the cursor position in the same loop we use PHA to push the text index value to the stack. As the stack also holds the program counter to return to after an RTS, we need to take care that the stack is restored to the state it was in when we entered the subroutine. So one additional PLA is needed before the exit RTS call as the text index is still on the stack! Remove this PLA and see the game go wild after pausing the game as the program flow returns to a mystery place somewhere in memory.
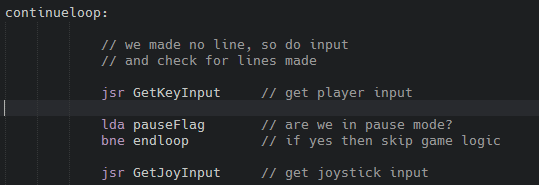
Next we need to change the main loop to check for pause mode:
If the game is in pause mode, we skip the whole game logic part of the loop by branching to the end of the loop. Joystick input code is also skipped, of course!
And here we are. Hit ‘P’ for presto!
Memory
Oh! How much do we have left of our $C000-CFFF (4K) block? Here’s the last output from Kick Assembler:
//------------------------------------------------------
//------------------------------------------------------
//      Kick Assembler v3.36 - (C)2014 Mads Nielsen
//------------------------------------------------------
//------------------------------------------------------

parsing
flex pass 1
flex pass 2
Output pass

Memory Map
----------
$3800-$3f3f character data
$c000-$cb42 code

Writing file: bin/main_Compiled.prg
Writing Vice symbol file: bin\main.vs
Writing Symbol file: bin\main.sym
[Finished in 3.6s]
So we are a little over 2K of code. We’re still good :)
Conclusion
Adding these bits to the game made it more complete. Each game needs a pause mode and joystick input doesn’t it? The game is really starting to become complete now so adding a title screen, difficulty selection and high scores are next… That will be a hefty big post so see you in Tetris in 6502 - Part 10.
